I've been doing a lot of research on inexpensive ways to make an impact for Halloween. Mainly, having props that are black light sensitive. With a little help from my husband, we decked out the mantle and experimented with all sorts of fun "glowing" things (more details below). Here are some pictures of how everything turned out with details of each picture and directions.
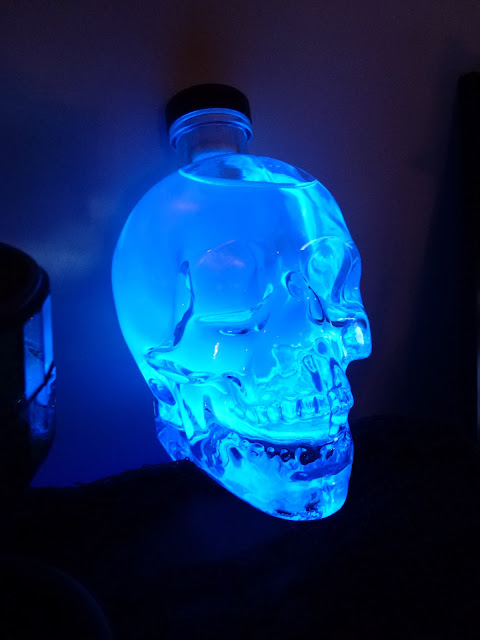 |
Empty Crystal Skull Vodka bottle filled with Tonic Water (quinine glows, which is in Tonic Water).
|
 |
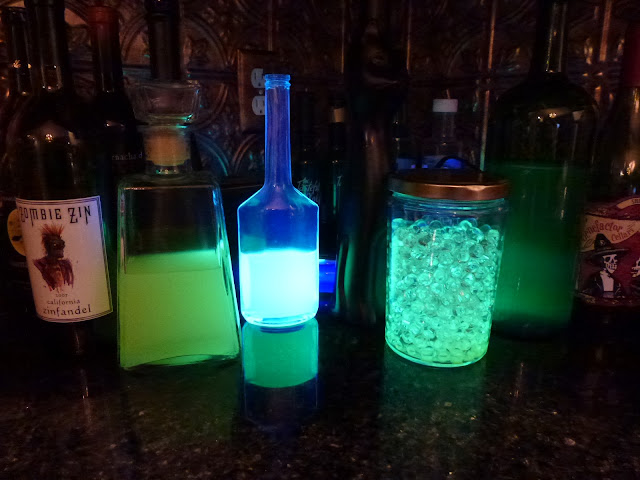
Glowing jar magic:
- Left Jar: Empty Tequila bottle filled with highlighter water. Directions below.
- Center Jar: Floral Beads soaked in highlighter water.
- Right Jar - highlighter water
|
 |
Detail glowing
|
 |
Floral bead detail
|
 |
Old champagne vinegar bottle detail
|
 |
How it looks without the black light on
|
 |
This one turned out great! Bottom layer is floral bead soaked in pink glow in the dark water. Details below. Top is floral beads with highlighter.
|
 |
Giant tequila bottle with highlighter water
|
 |
Glowing mantle!
Making Highlighter Water That Glows
This is one of the easiest and coolest things I discovered this Halloween season. Super inexpensive, too!
Supplies:
- Highlighters from the dollar store (any color)
- Empty glass jars or bottles
- Soaking pitcher, container, etc.
- Black lights
- Scissors or pliers
- Open a highlighter marker and pull the tip out using scissors or pliers. Remove the remaining tips of the same color. Add tips and empty highlighters to a large pitcher or container, at least 2 quarts in size. Fill with water. Let highlighter color penetrate the water and watch the magic happen. I let my first batch sit over night, and it was SUPER saturated when I woke up. Soaking for at least 2 hours would be ideal. I also found that inside the "empty" highlighter was another filament that colored the water, too. Pour colored water into your containers of choice, dilute with more water if necessary. Refill container with more water and highlighters and tips to make more water. Repeat until all fluid is absorbed into the water.
Coloring Floral Beads
Floral beads can be found at Walmart, Hobby Lobby or Michael's. They are usually around $1 a pack and come in a variety of colors. I've started with all clear beads for the projects pictured above. Note, when using floral beads, you need at least 3 hours for the beads to expand fully, usually best results are after 4-6 hours, so just plan ahead if you are wanting your display to be ready for a party.
Supplies:
- Floral Beads (can use any color)
- Water or Tonic Water - See below
- Glass jars or containers
- Optional - Glow in the dark paint
1. Using Clear Floral Beads: You have a few options on how to achieve your results. If you want clear beads that are black light sensitive, simply soak the beads in Tonic Water. This is the process listed in #2 below. If you want to color the clear beads you have two options: use highlighter colored water, or dye the water using glow in the dark paint. We experimented with both since we had the highlighter water and glow in the dark paint in a few colors.
* Highlighter water colored beads - Use prepared highlighter water to soak beads. Follow package directions, and substitute colored water for regular water.
* Paint colored beads - Start with designated amount of water needed for your beads. Add glow in the dark paint to the water and mix well. Add floral beads.
2. Using Colored Floral Beads: If using color floral beads, let them soak in Tonic Water so they will be black light sensitive and retain their original color. Follow directions on package, simply substituting Tonic Water for regular water.
|


Comments
Post a Comment